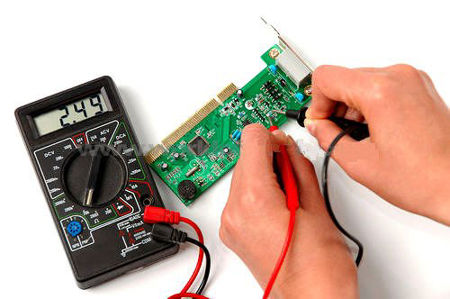
Testing your electronic components when you first get them and before installing them into one of your productions is essential. You want to see if they do what they have been planned to do, and what the manufacturer claims they can do. While you may not know exactly what the life of the component will be, knowing it works at first and with all expectations and needs covered ensures confidence.
One of the most used tools in testing electronic components are multimeters - in most cases it is preferred to use a self select multimeter as opposed to the auto-select ones. So when you start you should always discharge your component to ensure no built up electricity or other influence factors enter the test.
Batteries are measured by volts, while capacitors are measured in farads, both can be tested using the multimeter. For the battery connect the red lead to the positive of the battery and the black lead to the negative pole, depending on what voltage the battery claims to be will determine where you set the voltage scale. Use the 20 volt scale when measuring say a 9 volt battery - you should see a voltage reading of between 8.5 and 9.5 if the battery has a decent charge. Congratulations you have measured the battery’s resistance.
Capacitance is what you are measuring in a capacitor - it is measured in farads (units of capacitance). To measure you can use a farad scale of 20 farad for a capacitor with registered 10 farad - again discharge the capacitor and remember that a 20 percent deviation is acceptable - so a range of 9 to 11 farad for that 10 farad capacitor.
The multimeter can also be used for testing diodes - isolate the anode and cathode and first attach the red lead to the anode and the black lead to the cathode and measure the current flow. Then reverse the leads and make sure there is nothing registering - a diode only allows current flow in one direction.
Now you can do basically the same procedure to measure an LED, as it is a light-emitting diode. If you get a measurement when the anode connected to black and cathode to red you have a faulty LED, as light should only show when the connections are in the opposite attachment.
Next is the transistor. “A transistor, also known as a BJT (Bipolar Junction Transistor), is a current driven semiconductor device which can be used to control the flow of electric current in which a small amount of current in the Base lead controls a larger current between the Collector and Emitter (in the case of an NPN type). They can be used to amplify a weak signal, as an oscillator or as a switch,” a Tech Forum explains.
The two types of transistors are NPN (negative-positive-negative) and PNP (positive-negative-positive). When you connect the red lead of the multimeter to the central terminal and the black to the two outer terminals and there is a reading you have a NPN transistor, if you got no reading then it would be a PNP transistor.
Fuses can also be tested with a multimeter. Connect the leads to the terminals and you actually can get a reading and a beep if the fuse is working. Silence here means the fuse is dead.
You can also go through these videos to get testing methods used for other components.
-
Switches
-
Heat Sinks
-
Enclosures
-
Encoders
We will add more here as we develop the videos - so Bookmark and return occasionally to see what we have added.
temas bize:
 TR
TR
 English
 Chinese
 Italiano
 Portuguese
 Deutschland
 French
 Russian
 Japanese
 Turkish
 Korean
 Spanish
 hesabım ve siparişlerim

